
Area policy defines the area which the vehicle can/cannot enter; breaching this policy would trigger notification sent to your phone (via mobile app) and/or email.
Setting up Area Policy
Click on ‘Area’ to start setting up the Area Policy.
Step 1 : Define Policy
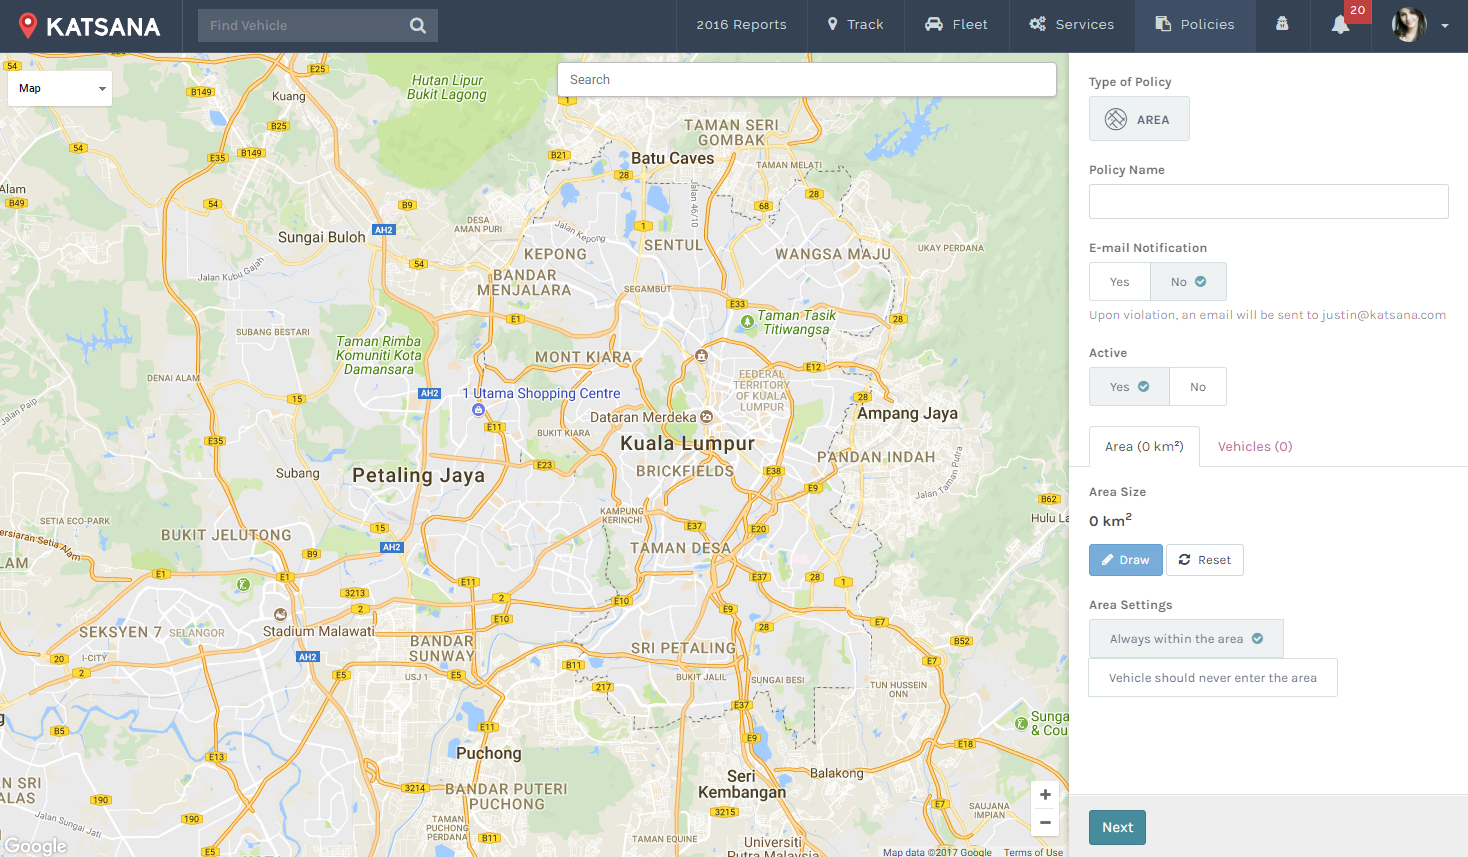
Here are the explanation of each fields :
| Policy Name | : | This is the name of the policy, shown in both your policy list and your notification. |
| E-mail Notification | : | Set whether you wishes to receive email notifications (Yes) or not (No). |
| Active | : | Set whether you wish for this policy to be activated (Yes) or not (No) |
| Draw Area | : | Set the geo-fence for the areas (jump to ‘How to draw a geofence‘). |
| Area Setting | : | Always within the area – Triggers notification if vehicle leaves the designated area. Vehicle should never enter the area – Triggers notification if vehicle enters the designated area. |
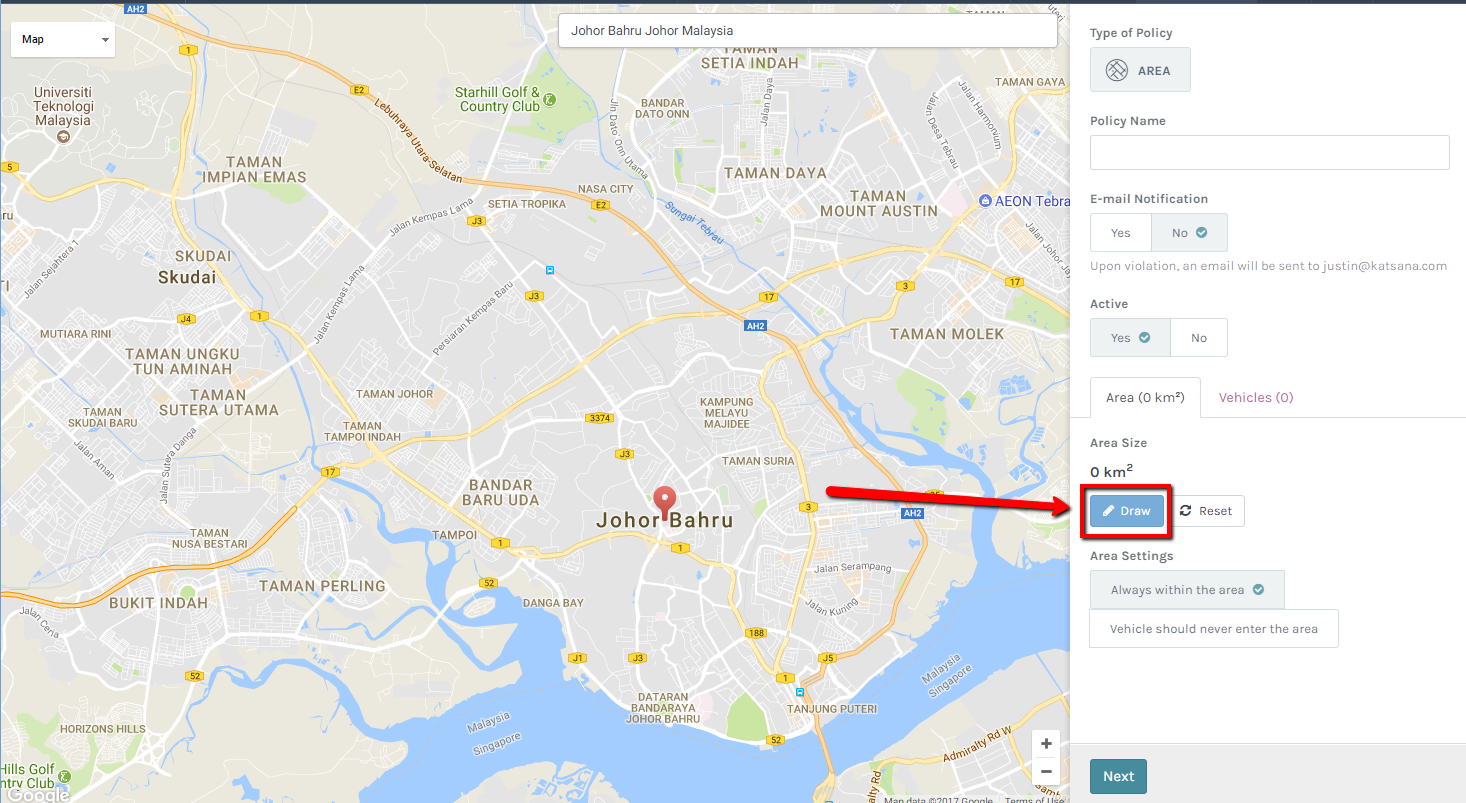
How to draw a geofence
- Find the area/location that you wish to declare as your policy. You can use the search at the top of the map to search for an area.
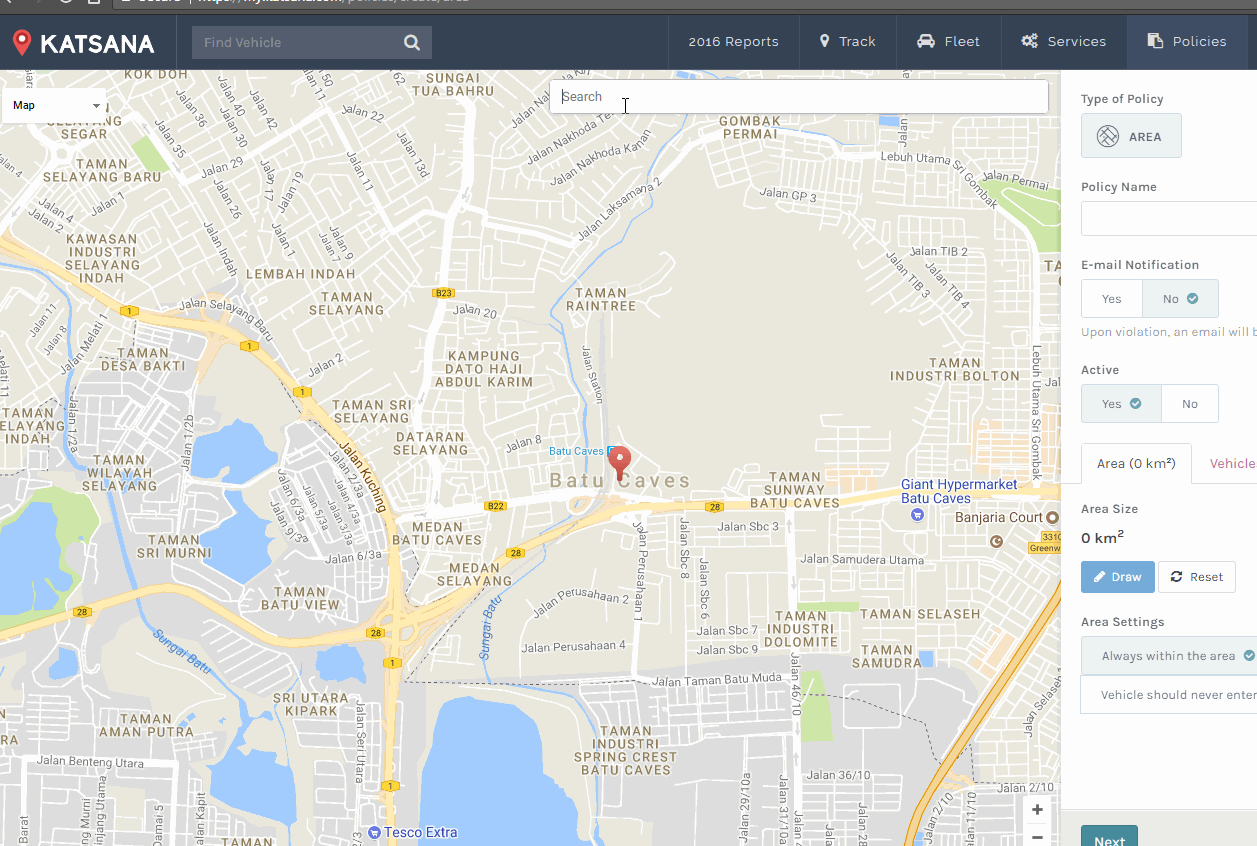
- Click on the ‘Polygon’ button at the top-left section of the policy’s map.
- Start clicking on the map and highlight the area that you want; ensure that you click back at point #1 to close the loop.

- Clicking on the first point will close the area, you can proceed to the next step.
- You can reset the whole geofence by clicking on the ‘Reset’ button.

Step 2 : Select Vehicle

Next step is to select the vehicle that you wishes to apply the policy to. All of your vehicle should be listed here; click ‘Select All’ if you want to apply the policy on all vehicles. To apply to selected vehicles, click on the selected vehicle’s card.

You can also search for the vehicle’s plate number or the description! Pretty neat, huh?

Choose the appropriate vehicle? Click on ‘Next‘ to move to the next step, ‘Prev’ to move to previous steps or ‘Cancel‘ to cancel the policy creation.
Step 3 : Verification and Complete!

The next step is a summarization of the policy that you’re about to create and impose on the chosen vehicles. You can either click ‘Prev’ to go back to the previous settings and amend it or, if you’re satisfied, click ‘Submit’ to save the policy and apply it to the chosen vehicle(s). You will be automatically redirected to your Policy list page.
Editing Area policy
You can easily update your policy by clicking on ‘Policy’ from any screen. From there, click the edit button on any policies that you wishes to edit.

The Edit Policy screen for the chosen policy will be shown.

The screen is just the same as the ‘New Policy’ screen. Update any information that you want and click ‘Next’. You will have the option to select which vehicles to impose the policy on.

Once you’re done, click ‘Next’. The summary of your edited Policy will be shown.

Should you find that there are fields that you wishes to update again, click ‘Prev’ to return to the previous page. Click ‘Submit’ once you’ve finalized everything to update the policy. You will be redirected to the Policy list screen and will greeted with a success message as shown below :

Disabling Area Policy
You can disable your policy by clicking on the enable/disable button :

![]() This will enable the policy.
This will enable the policy.
![]() This will disable the policy.
This will disable the policy.
Another way of disabling the policy is by clicking on the edit ![]() button. You will be redirected to the edit policy page. Set the ‘Active’ field to ‘No’ and save the policy.
button. You will be redirected to the edit policy page. Set the ‘Active’ field to ‘No’ and save the policy.
