
Working hour policy, labeled as “Movement” in the policy screen, is a policy where users are able to define the day and time for the vehicle’s to be active. Users can set, for instance, vehicles should not travel during weekends. A notification will be sent whenever this policy is breached.
You can also use our mobile apps’ notification setting to receive notification whenever your vehicle moves. Refer to our mobile apps docs here.
1. Setting up Working Hour Policy.
2. Editing Working Hour Policy.
3. Disabling Working Hour Policy.
Setting up Working Hour Policy
Step 1 : Define Policy
Set working hour policy by clicking on Policy and then click on “Movement”. You will be greeted with the Movement Policy setting screen :

| Policy Name | : | This is the name of the policy, shown in both your policy list and your notification. | ||||||
| Days | : | Set the days for the policy to be implemented. | ||||||
| Time | : | The time for the policy to be implemented. | ||||||
| Time Option | : | These are the rules for the time set in “Days” and “Time” field.
|
||||||
| Email Notification | : | Set whether you’ll receive email notification if the vehicle breaches the policy. | ||||||
| Active | : | Activate the policy by choosing “Yes”. Choosing “No” will disable the policy. |
Once you’re done, click ‘Next’ to move to step 2.
Step 2 : Choose the vehicles
Next step is for you to choose the vehicles that are affected by the working hour rules you’ve set on Step 1.

Click on any vehicles that you wish to apply the policy to. Should you wish to apply to all of your vehicles, click on “Select All”.
The number besides “Select All” is the total numbers of vehicles that you have.
Once you’ve selected the vehicles, click “Next” to go to the final step.
Step 3 : Review Summary

Check and ensure that all settings are according to your preference. Click ‘Prev’ if you wish to make any changes. If you wish to proceed, click ‘Submit’ and you will be sent back to the ‘List of Policies’ screen.
Editing Working Hour Policy
Step 1 : Click the Edit button.
To edit your policy, login to your account and click on Policy. From there, click on the edit policy button.
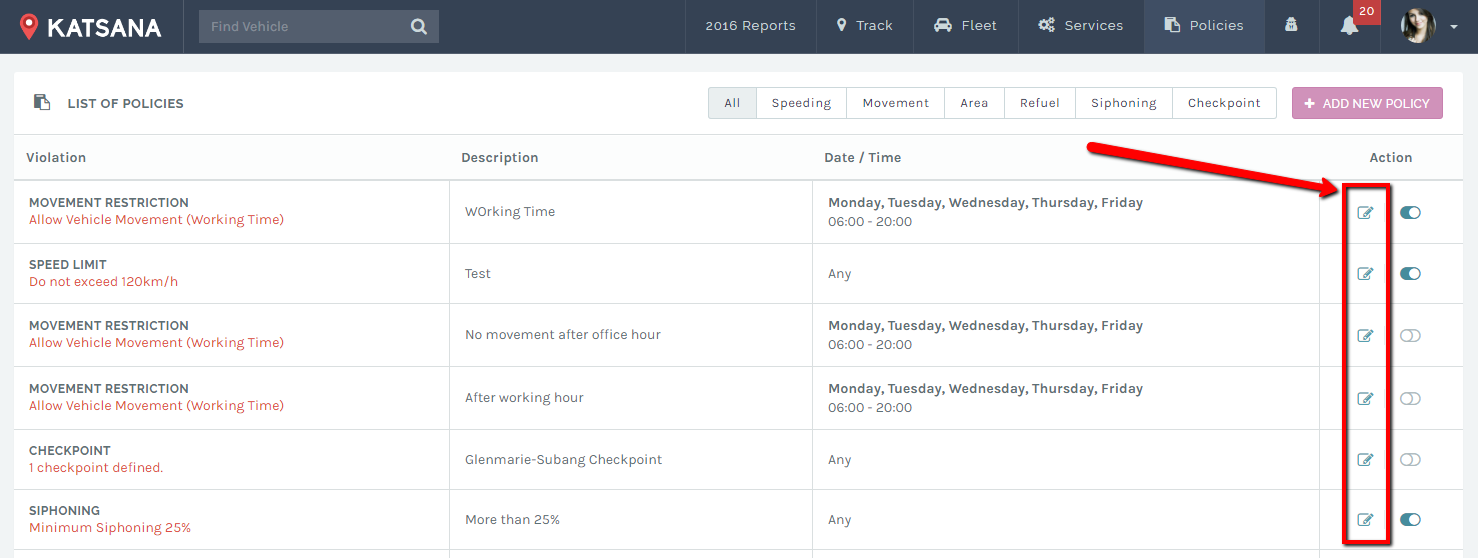
Once you click on the edit button, you will be sent to the edit policy page.

Basically, editing a working hour policy is the same as creating a new ones, with a slight difference that the current already-saved data is shown. Update the policy details and click ‘Next’. Click here if you need assistance with the definition of each fields.
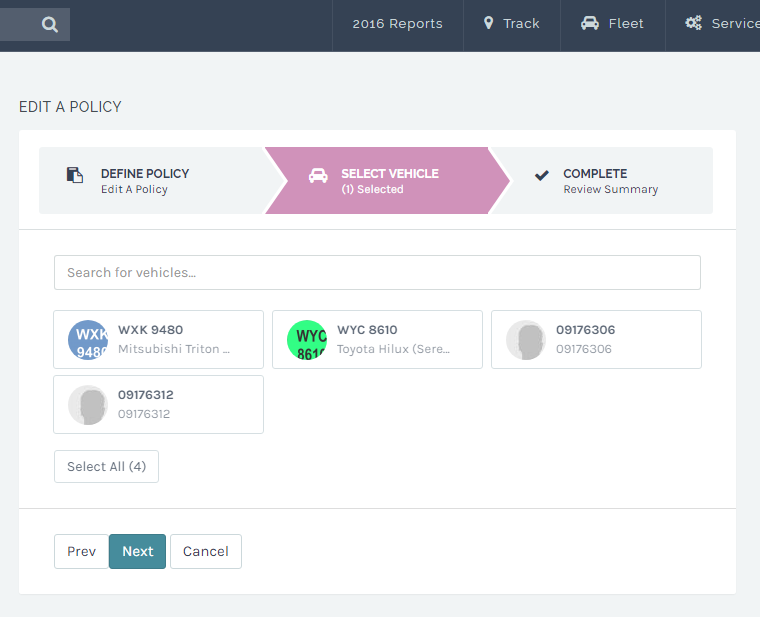
Here, you can choose your vehicles that you want to impose the policy to. Click ‘Next’ to proceed to review the policy.
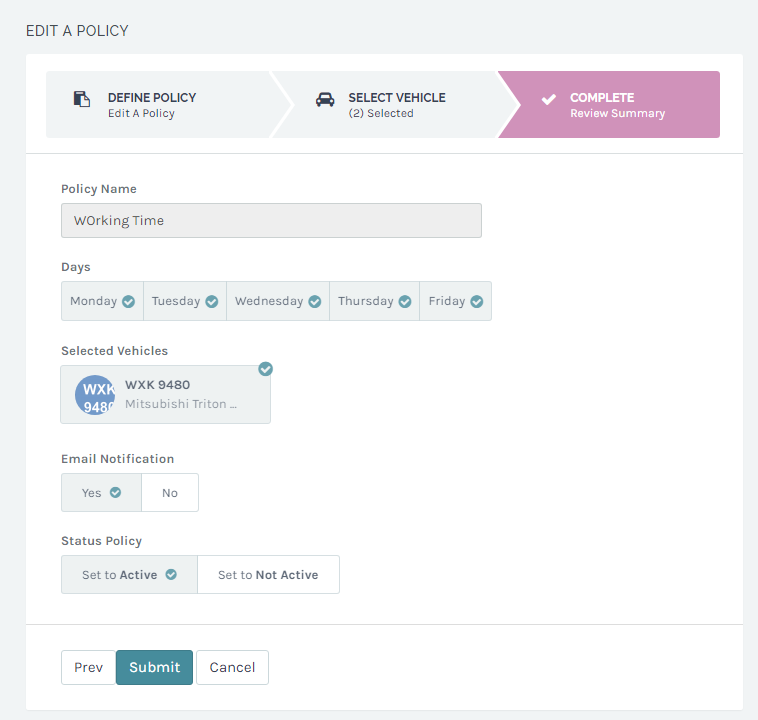
Click “Submit” and you have successfully updated the policy.
Disabling Working Hour Policy
To disable your “Working Hour Policy”, login to your account and click on Policy. From there, click on the edit policy button.
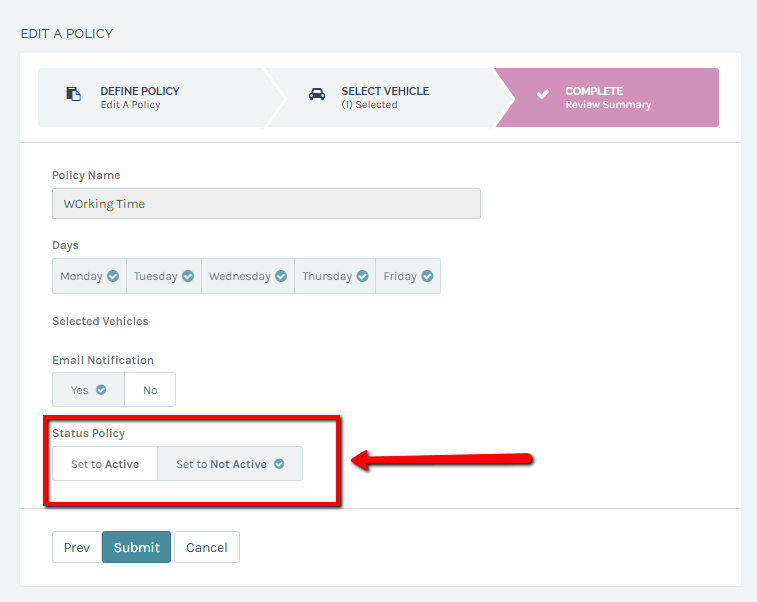
From the edit policy screen, set “Active” to “No”.
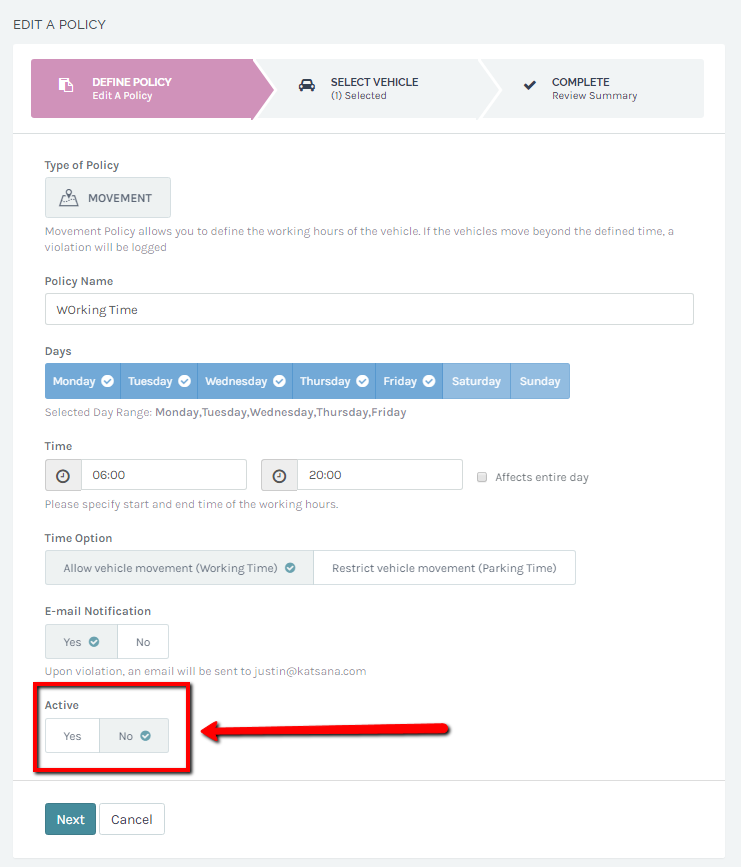
Proceed clicking ‘Next’ until you arrive at the Review Summary page. Ensure that “Status Policy” is set “Set to Not Active” as per outlined in the screenshot:
Click ‘Submit’ and you have successfully disabled your policy.